Stone Texture Concrete Floor | Easy DIY with RollerRock
Concrete floors can be an attractive alternative to common indoor flooring such as wood, tile, or carpet. But plain, unaltered concrete floors seem…unfinished. Even concrete flooring outdoors on your patio, driveway, or pool deck may look boring when left untreated. Using RollerRock from Daich Coatings to create a stone texture concrete floor not only adds interest to your flooring, but creates a heavy duty coating that will last for years. This simple DIY tutorial will show you how I added stone texture to my basement workshop floor using RollerRock – and how you can do it too!

This post may contain affiliate links. If you make a purchase, I may earn a small commission at no extra cost to you. As an Amazon Associate, I earn from qualifying purchases. Read more about these links in my disclosure policy.
Advantages of Stone Texture Coating on Concrete
As I mentioned, adding a stone texture coating such as RollerRock can give you a beautiful, uniform color to your concrete floor. Daich Coatings currently offers 15 color options for RollerRock, and I chose the Deep Slate color.

Aside from being a pretty color, there are other advantages to coating your concrete with RollerRock:
- water & chemical damage resistant
- impact & abrasion resistant
- mold & mildew resistant (important in a humid basement like mine)
- U/V brittle resistant
- salt damage resistant and freeze/thaw resistant (if using in a garage or driveway in cold locations)
- resists hot tire pickup (important for driveways or garages)
Stone texture coating can even be used in shower areas or bathroom floors, since it resists moisture, mold, and mildew. The texture (which is 100% real stone) adds traction to the floor, creating an anti-slip surface that is almost 2x the requirement of OSHA (an agency that measures safety standards).
For me personally, I didn’t like the stains and inconsistencies in my concrete floor. I don’t know what or where those stains came from, but they made my workroom feel grungy. And the powdery and “dirty” feeling of bare concrete just always felt gross. By adding RollerRock on the floor, I was able to get rid of all those problems as well as creating a floor that was much easier to clean!
Disadvantages of Using RollerRock
Just as I shared the disadvantages of painting my garage floor with epoxy, I will share what I consider to be “disadvantages” or “watch-outs” before considering RollerRock or another stone texture coating for your concrete:
- It stinks. Just like paint has an odor, so does RollerRock. It’s not as strong as the epoxy paint I used in my garage, but it smells all the same. The TracSafe coating that goes over the RollerRock smells bad too. I would recommend opening windows if indoors, to allow for as much ventilation as possible.
- PREP IS ESSENTIAL. I go into more detail below, but you have to clean and prepare the floor before applying the stone coating or you will not get the best results. No shortcuts here, y’all!
- While RollerRock can dry pretty quickly (depending on temperature and humidity), it does take some time to prep the surface, let the RollerRock fully dry between coats, plus the time for the TracSafe top coats to dry. You would need to budget out a few days at least for the floor to safely dry and harden to avoid damage.
That’s it really – no surprises here, just a few things to be aware of before you create a gorgeous concrete floor with stone texture!
Read on for the full DIY tutorial – as well as what NOT to do!
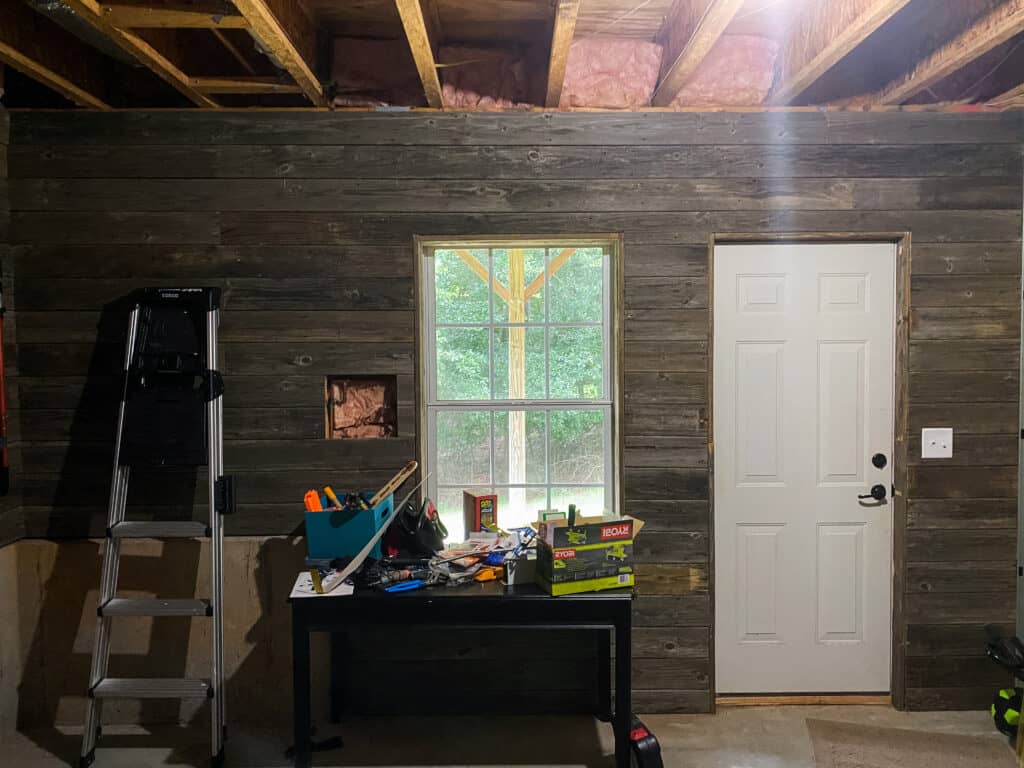
My Wood Room – Before

When we first toured our home last summer before buying, this room in the basement seemed really neat! It was used as a storage room, as we have been using it for the past year. The previous owners rebuilt and extended the back deck on the main floor, then used the old deck boards to cover the exposed studs in this room.

Reclaimed wood walls are SO COOL. But it was REALLY dark in here. (Also had to move the NERF armory that I built – see that tutorial here.)

After starting my DIY kitchen remodel and trying to sand and paint cabinet doors in my garage, I realized I wanted my own workshop in the basement. This room was the perfect place since it already held all of my tools (plus everything else), but it needed a little facelift before I could call it my own.

I used a whitewash painting technique to lighten up the wood walls, while still keeping the rustic farmhouse look. My friend Jacki from Crazy Life With Littles (she’s a DIY boss, y’all) suggested a dark paint color on the half concrete wall, to add some contrast. It ties in so well with the darkness of the reclaimed wood and just makes everything pop!
(Plus it hides that uglyyyy concrete wall.)

I used more whitewash paint to brighten up the other concrete wall, added some boards on the shelving to create a tool organizer, and hired a contractor to install drywall to finish the back wall.
My DIY skills have limits, and I’m ok with that.
Once I had all the walls done, I was ready to move onto the floor!
How to Paint Concrete Floor with Stone Texture
Ok ok, technically RollerRock isn’t paint – Daich Coatings says it’s a high performance concrete coating made of stone. But while it isn’t paint, it is applied in the same manner as paint, and sometimes I slip up and call it painting the floor. Anyway – here’s how to do it.
Materials Needed
- Daich Coatings RollerRock (1 gallon covers 80-100 sq ft if using stone texture technique, and you need to apply 2 coats)
- Daich Coatings TracSafe Anti-Slip Sealer (1 gallon covers about 400 sqft, and you need to apply 2 coats)
- (so important I won’t call it optional) power drill and paint mixing attachment
- Concrete cleaner & etcher solution
- 2 gallon plastic watering can
- deck brush with stiff bristles
- extension pole
- paint roller tool
- stone texture paint roller
- 3/8″ nap paint roller cover
- paint tray and 2-3 plastic paint tray liners
- 2 paint brushes (basic, economy brush is fine)
- safety glasses, rubber gloves, and safety boots/waterproof boots
- (highly recommended for outdoors) pressure washer
- (highly recommended for indoors) wet/dry vacuum

A few important notes about materials:
The paint mixing attachment is really not optional. I learned how important it was when mixing the paint/epoxy for my garage floor, and it was essential with this project as well. You really must use it to fully mix the stone texture coating (I literally broke a wooden stir stick trying to mix it myself).
Daich Coatings makes a concrete cleaner & etcher (linked above), but it was not available at the time from Home Depot or on Amazon. I had a different cleaner/etcher solution on hand already, so I used that one and it seemed to work fine.
I definitely recommend using Daich products, but shipping from Canada to the States can take some time – so plan ahead or check for an alternative brand.
Similarly, Daich makes a stone texture paint roller cover that is likely the best possible option with RollerRock. I didn’t order it from Home Depot in advance, so I had to find an alternative. Do NOT use this texture roller cover from Wooster. It DOES NOT work for this project. If you need an alternative, use this textured sponge roller. It may not be the best choice, but it worked out well for me!
Preparing the Concrete Floor for RollerRock
By thoroughly cleaning and etching the concrete before applying the stone texture coating, you can ensure the best product adhesion and a long lasting finish.
Begin by removing everything from the floor and sweep/vacuum to remove any dirt, dust, or debris. Mix the cleaning/etching solution with water as directed – usually 1 gallon of solution to 1 gallon of water. A 2-gallon plastic watering can is perfect for mixing and applying the solution to the floor.

I (usually) make sure to wear safety glasses, protective gloves, and rain boots for protection from any splashing.
Let the solution sit a minute until the fizzing and foaming dies down. With a deck brush, work the solution into the concrete to really clean and etch the surface.

If you are working with concrete outdoors, pressure washing the concrete to remove the solution and other dirt/stains is the best way to ensure a clean surface and best results.
If indoors, just clean/etch with the solution and deck brush, then rinse with fresh water and vacuum with a wet vac. Repeat the rinsing and vacuuming until all solution has been removed from the floor.
Let the concrete fully dry before moving on to the next step – painting the concrete!
Applying RollerRock Textured Concrete Stone Coating
Once the concrete is clean and dry, you can begin the stone texture painting process. RollerRock is self-priming, so no need to apply any sort of primer (unless you are using tape to create “grout lines” or decorative stencils, which we did not).
Because RollerRock is made with 100% stone, the stone texture bits settle to the bottom of the paint can. Imagine stirring paint that is mixed with sand or really fine gravel, using just a wooden stir stick. It is almost impossible! For that reason, to be able to really mix the contents well, I advise using a paint stirring attachment and a power drill.

Start with a very slow speed so as not to slosh the contents. Gently press the stirrer into the bottom of the can until you feel it brushing against the stone texture pieces. It may take 2-3 minutes to fully break up the sediment in the bottom of the can until it mixes in with the liquid. Once you no longer feel bits of stone sediment stuck to the bottom of the can, you’re ready to pour and paint.
What NOT to do –
I didn’t realize how important it was to use my mixer attachment when I first started, and instead I mixed it by hand. I also used the WRONG paint roller cover (the Wooster one I mentioned above).
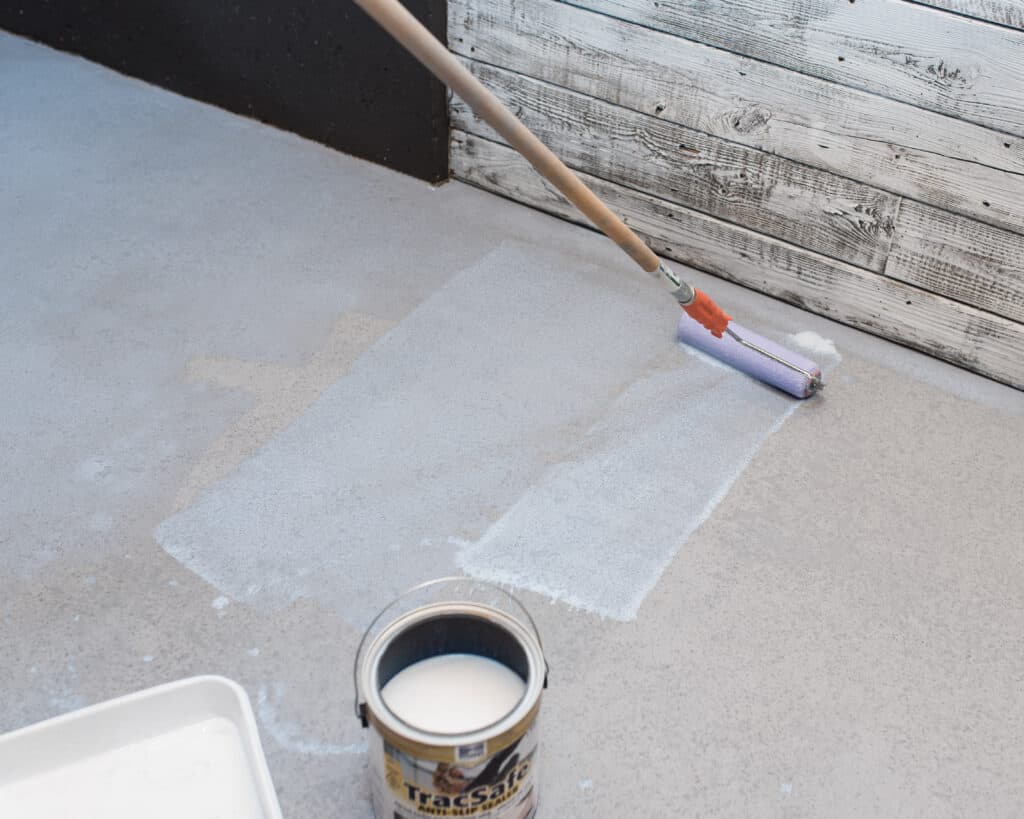
My first gallon of RollerRock was sooo hard to evenly apply to the floor and it took me forever. I used one whole gallon of paint and only covered 1/4 of the floor (less than you see painted in the photo below), where I should’ve covered at least half the room.

Once I switched to using my mixing attachment and the sponge paint roller cover, things went WAY more smoothly! I also covered about 2/3 of the entire floor with that second gallon of RollerRock. Learn from my mistakes, y’all! Do it right the first time, haha.
Keep your drill nearby to mix the RollerRock again later before refilling your paint tray.
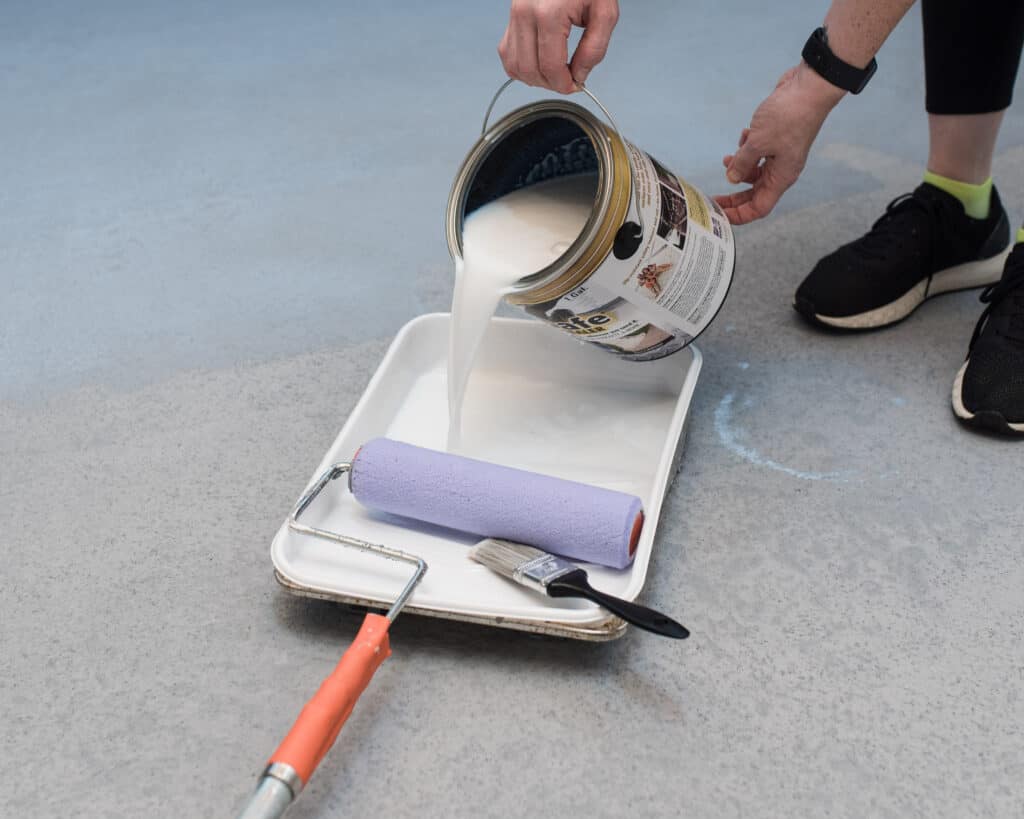
Now that your coating is well mixed, put your plastic tray liner into your paint tray and pour a good amount of RollerRock into the tray. You want enough to be able to fully soak your paint roller cover before applying.

Roll the RollerRock onto the floor, smoothing out any heavy paint areas. Don’t worry too much about any spots that don’t look fully covered. Those will be filled in with the second coat.
Use your paint brush to edge against any walls, to avoid your paint roller getting the stone texture onto them.
After you finish the first coat, allow the RollerRock to dry for a couple of hours before applying the second coat. Be sure to paint in the opposite direction (or in random directions) to really cover up any spots and to avoid harsh lines.

Painter’s Tip: Store your paint roller or brush inside a grocery bag or in the fridge between coats, to prevent your tools from drying and hardening!
If possible, let the floor fully dry overnight. Vacuum or sweep any loose stone pieces. Then you’re ready to apply the TracSafe top coat!

Applying TracSafe Anti-Slip Sealer
While RollerRock is pretty anti-slip by itself, applying TracSafe as a top coat provides added protection to your flooring. It helps to seal the surface to keep your stone texture coating looking good for years to come. It also gives it a satin sheen, which makes the floor look better and more finished!

TracSafe comes pre-mixed, which makes it easy to use! I did use my paint mixer attachment to make sure to have all the liquid combined well for a smooth application.

The liquid is very thin and milky looking, which means a little goes a long way One gallon was enough to apply two coats to my 144 sq ft room. I recommend using a paint brush to apply it on the edges of the floor near the wall.
Rolling the sealer on the floor goes very quickly and took me only a few minutes. I tried to smooth out any super obvious areas where I applied too much liquid, but any lines that remained dried clear.

It is recommended to apply two coats of TracSafe, with about 6-8 hours of drying time in between. I applied my first coat in the morning and the second coat in the evening. By the next morning, my floor was finished and ready for me to enjoy!
My Wood Room – After

I am so pleased with how my little basement workshop turned out. The walls have made it so much brighter, and the floor helps to reflect some of that light too! The floor is so much easier to clean now and the whole vibe in here is much more inviting.

I’ll probably always call the the wood room (our nickname for it, because of the wood walls), which is perfect because I plan to work with a lot of wood projects in here!
First up – building myself a work bench in the corner. Then I think I’ll get back to sanding and painting those kitchen cabinets that I’ve been putting off for the past few months! Not sure what I’ll build after that, but I hope you stick around to see!
RollerRock and Textured Concrete Paint FAQs
How much RollerRock do I need?
With stone texture painting, RollerRock can cover 80-100 square feet. Double that to account for two coats.
How much TracSafe do I need?
One gallon of TracSafe can cover about 400 square feet. You will need to apply two coats.
What is the best brush for applying RollerRock?
A brush is only needed for applying RollerRock in areas near walls or in hard-to-reach places. A stone texture paint roller cover is best for widespread floor application.
What paint roller is best for applying RollerRock?
Using the Daich Coatings stone texture roller is the preferred application tool. If unavailable, a faux finish sponge roller is an alternative option.
What sealer is best to use over RollerRock?
After applying RollerRock, you can seal with Daich Coatings Hi-Build Ultra or TracSafe Anti-Slip Sealer. We used TracSafe here.
Where can you buy Daich Coatings RollerRock?
RollerRock is available on the Daich Coatings website, from Home Depot, and on Amazon.

MEET AMANDA
Amanda is a mom of 4 living a mostly crunchy lifestyle outside of Atlanta, GA with her husband, 2 dogs, and a cat. As a former special education teacher who also has her personal training certification — Amanda really enjoys teaching others how to do things!
When she’s not working, Amanda enjoys DIY projects, exercising, photography, hiking, and long walks through Target.


