No-Sew Lap Desk Tutorial | DIY Laptop Desk
Since I’ve started blogging I’ve been working on my laptop all over the house. Not always in the best postural positions. Today I decided I needed to make myself a no-sew DIY lap desk for my laptop.
I asked for some opinions on Facebook and took what I learned and what I wanted to incorporate and made myself a No-Sew Lap Desk. This post right here is my portable laptop desk’s maiden voyage — and so far, so good!

Key Features for Lap Desk
When it came to planning what I wanted I tried to make sure I covered every aspect and looked at all the pros and cons.
- I definitely wanted to be able to work at an angle.
- I wanted a wooden top to help keep it solid and cool.
- It would need to have a ledge for computer and notebook as well as one for my phone.
- I wanted to ensure it would not slide between cushions on the couch.
- Last but not least it needed to be light enough.
No-Sew Lap Desk Supplies
- 16 ‘ Laminated pine shelving
- table saw or circular saw, miter saw
- Sander and sandpaper
- Stain, gloves, rag
- Polyurethane spray sealer
- Trim board
- Paint (I used Cyan Blue)
- Foam (I used 6-inch foam)
- Sharpie
- X-acto knife
- 1/2 yard upholstery fabric
- T-50 Stapler and staples
Prepping the Laminated Pine Shelving

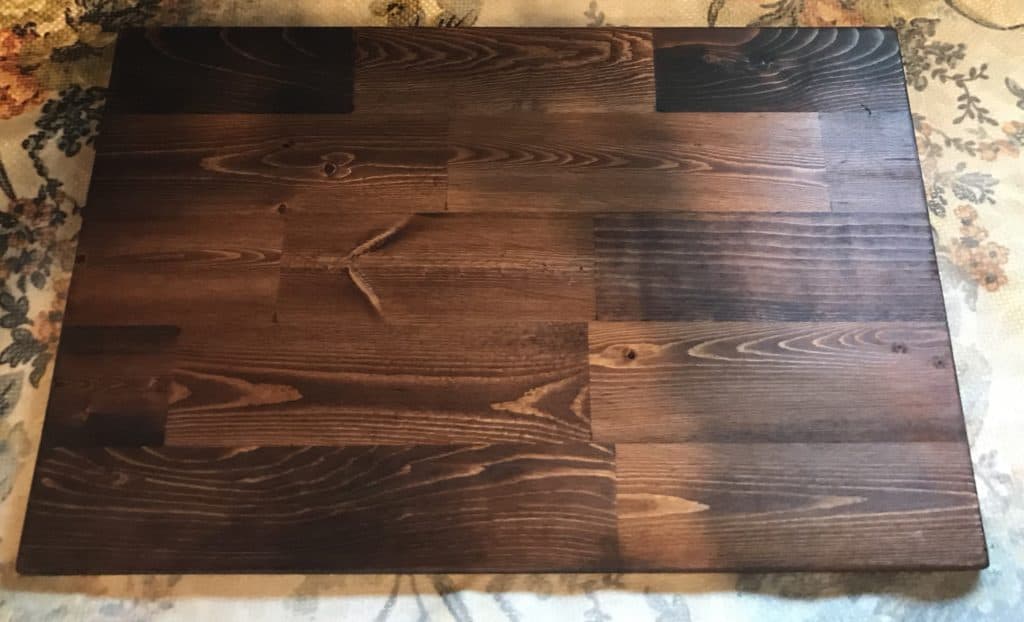
Laminated pine shelving is one of my absolute favorite types of wood to buy. The wood is so gorgeous stained and has a butcher block look to it.
I have used it all over our home when renovating for projects like our wrap-around pantry and for our entryway bench!
Best of all, this wood is good on both sides and needs minimal sanding.
Cut your desired length on a table saw or using a circular saw. My top is 24″ long x 16″ wide.
Oddly enough 16″ pine comes in 16″ yet 12″ inch comes in 11 3/4″, just a bit of useless information I found interesting enough to share with you all!
Now you can give it a quick sanding, you pretty much just need to sand the cut edges.
Stain DIY Lap Desk Top Desired ColoR

Give it a couple of coats of stain (red mahogany by Minwax was my stain color).
Apply in thin coats to help it dry incredibly fast.
Just dip a rag into your stain a bit and rub it on and off ensuring no excess stain is left on the wood.
Seal the Laptop Desk Top
After your stain is dry, seal it with polyurethane spray to protect it.
I keep a few pieces of wood stored like this in various lengths and colors for when inspiration hits.
It just so happened that I already had a board stained and sealed ready to be made into something fabulous like my no-sew lap desk!
DIY Lap Desk Featuring Ledges for Laptop, Mobile & Notebook

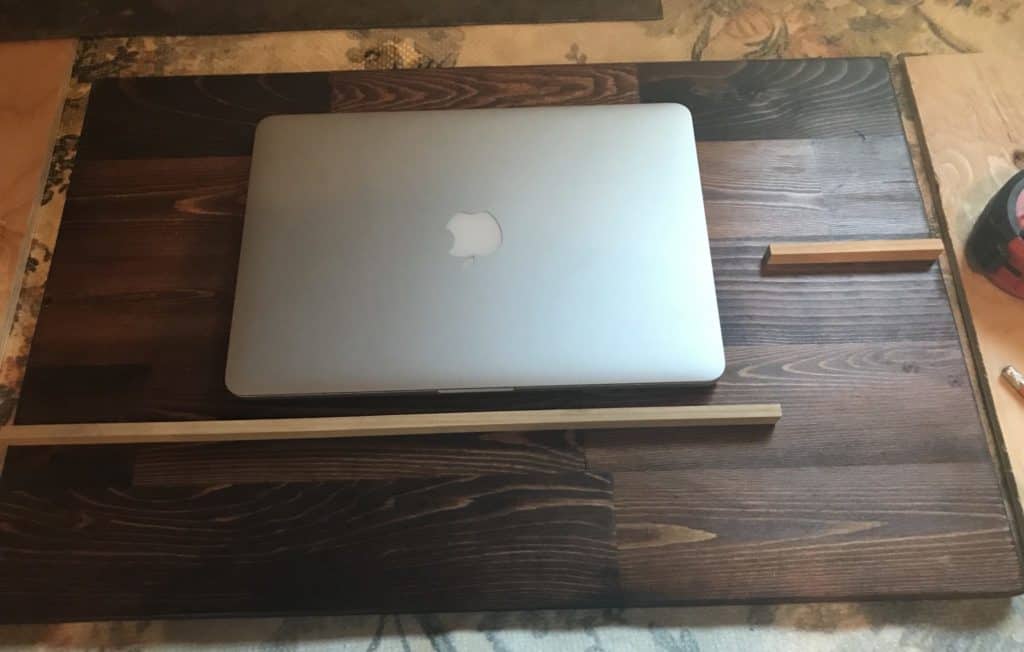
Next, I took a decorative piece of trim and cut it into two pieces.
These are the ledges for my phone and my laptop to rest on. I made my laptop ledge extra long which allows me to set my notebook and pen there as well.
My phone ledge is approximately 5 inches higher.
Simply mark a line 4.5 inches from the bottom for the longer ledge and use your mobile phone as a guide for the second ledge.

After sanding the cut edges give them a coat of your favourite paint or match to your fabric. I chose Cyan Sky by Beauti-Tone, the same colour I used in my Kitchen Cupboards Update.
Put them off to the side they will not be needed until the end of this DIY tutorial.
Use Foam to Give The Lap Desk Comfort

This step is a bit tricky but necessary. Because of working with a large piece of foam and seeking an angled edge, it makes it that much more difficult to cut.
For my foam, I used a big chunk of six-inch foam leftover from a pontoon boat I had upholstered a few years back.
The foam was quite dirty from being stored in the garage that we heat with wood and not covered but it would do the job.
Using the sharpie, trace the lap desk board on top of the foam. Then work in layers with an Olfa knife to cut straight down on both sides to make it square.
The secret to buying foam on the cheap is to purchase a foam mattress!
Foam can be incredibly expensive, especially foam for upholstery. Mattress foam can be substituted for a lot of projects saving you a lot of moolah! This foam was only $99 for a twin size mattress!
Mark the Foam Measurements with a Square and a Sharpie

Using a square measure one inch on one end of the foam. Then use the square to go from my one-inch mark to the very tip of the other side so that it creates a slope from 6 inches down to 1 inch.
Then using the square and a sharpie mark the line. Repeat on the opposite side of the foam.
Cut the Foam to Shape
This is where it gets tricky! Because it is a long area to cut it gets difficult to stay on track.
Pro Tip: An electric knife works amazing for cutting foam!
Go slowly and try to stay on the same angle. Work from side to side meeting in the middle.
Once the angle is cut I place the board on top and cut off the excess on the high sloped side to create a 90° angle.

Upholster the No-Sew Laptop Lap Desk
I used approximately 1/2 a yard of fabric for this project. I already had this beautiful fabric on hand from another project I could not decide on at the time, my victorian chair, you have to check it out.
Upholstery fabric is much thicker than regular fabric and more resistant to wear and tear. Therefore, it holds up much better over time.
Using upholstery fabric is essential when you will be stapling and stretching fabric.

Laying the foam and board on top of the fabric be sure to ensure there is enough fabric to overlap the top of the board. Leave about a 1-1/2 inch excess on each side.
Then lay the board right side down and fabric right side down with a bit of overlap on the upper edge of the board and stapled it in place. This would be the side where the 6-inch slope will be placed.

Now place your board with attached upholstery fabric onto your foam. Trim off any excess to ensure nice neat folds.
Folding the Sides of the Lap Desk Fabric

Tuck the top corner of your fabric underneath your board and smooth out your fabric creating a nice crisp corner like you would when gift wrapping.

For myself, I found it easier to flip it onto the foam and tuck my edge up under the board making sure I had a nice crisp fold. I did this for both sides.

Using a stapler put a few staples in to hold the fabric in place while working on the last and final side.

For the final side, fold the fabric creating another envelope cornered flap to go underneath the board.

Pressing the fabric down to the board staple it to the board nice and snug. Now go around with your stapler and make sure all three sides are nice and secure.
Attach your laptop, mobile and notebook ledges to your DIY Lap Desk!

This next step takes a whole two minutes. Setting up the air compressor takes the most of that time.
Simply put a few nails into each ledge along the lines I marked on the board earlier.

The ledge for the laptop uses the widest side to allow maximum-height to help keep the laptop nice and secure on your desktop.
The mobile ledge does not need to be quite so thick so you can choose which side to secure to the lap desk.
I chose the narrow side protruding and therefore nailed flat. I had no rhyme or reason for this, just thought it looked kinda cool. But now I think it actually helps from catching my hands on it while using my lap desk.

Enjoy your New DIY No-Sew Lap Desk!
That is the complete no-sew lap desk tutorial!
All in all, this project was done within an afternoon from the time of my Facebook post to completing the finished product. However, add additional time for preparing your wood, mine was already on hand, ready to go.
No-Sew Lap Desk Overview of Features
Now that my maiden voyage of testing out my new lap desk is complete I must say it definitely makes a huge difference for my awful back pain and shoulder/neck knots.
- Although the board is quite large it is still lightweight and comfortable on my lap.
- The ledges do not get in the way while I’m typing.
- The slope helps me work at a better angle.
- Because there are no legs I don’t need to worry about them slipping between the couch cushions.
Not to mention that it is made with my favorite color!
Thank you to everyone who shared what they liked best about their own personal lap desks.
Now I can blog in style and in comfort in any room of my home. Because I’m a hoarder my total cost for this project is $0. I had everything on hand already.
If you were to buy a smaller mattress you could easily do this project for under $50.00.
Let us know if you try out this project or any of our other DIY projects. We always love to hear feedback!

Update on my No-Sew Lap Desk!
Since putting together my no-sew lap desk I have been using this desk every single day and I absolutely love it!
I use my no-sew lap desk on the couch, in bed or at the kitchen table! Anywhere I want to work!
I’m no longer glued to my office desk and my back and shoulders are much better in relation to all the hours I put in on the laptop.
I could not be happier with this project! It has definitely become a major instrument in my everyday blogging career!
Go ahead make your own No-Sew Lap Desk today!


