Easy Craft Stick Snowflake Wreath | DIY Holiday Decor
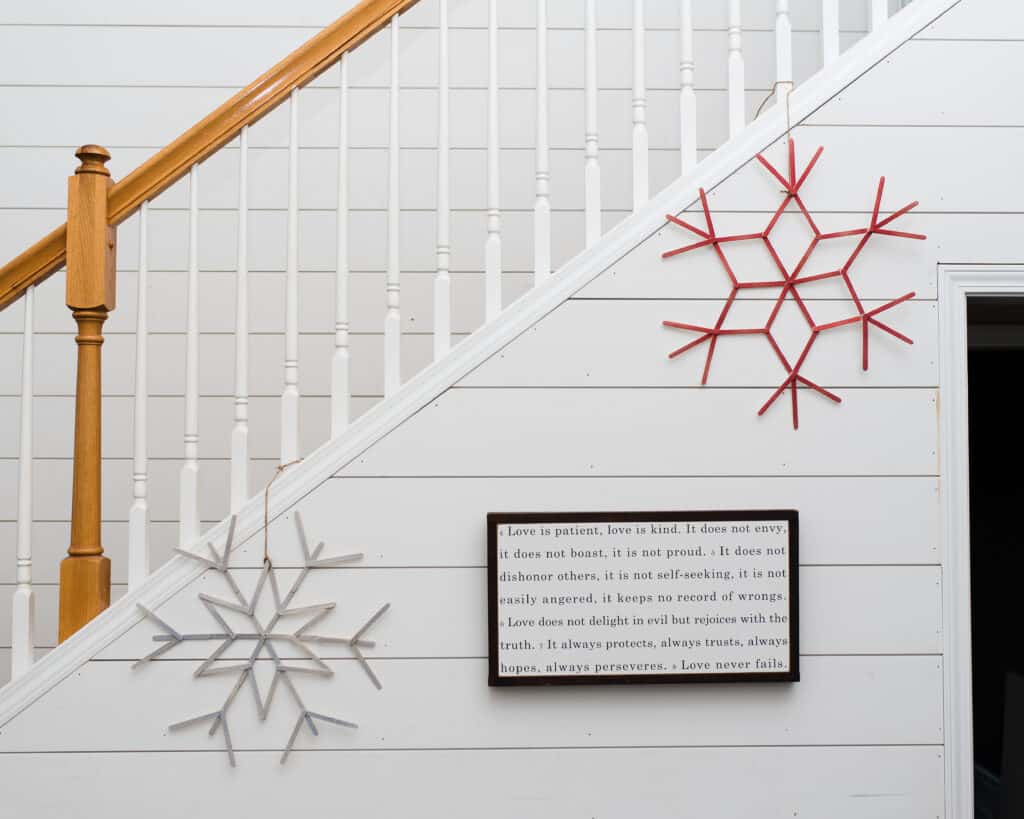
This DIY craft stick snowflake wreath is super easy to make, and is fun for the kids to help with too! With just a few supplies and about 30 minutes, you can have beautiful and unique holiday decor.

This post may contain affiliate links. If you make a purchase, I may earn a small commission at no extra cost to you. As an Amazon Associate, I earn from qualifying purchases. Read more about these links in my disclosure policy.
How to Make a Craft Stick Snowflake Wreath
I’m all about that DIY life, and finding fun new holiday decor to make has been my mission this year! I wanted something that the kids could join in on, and I thought this snowflake wreath made out of craft sticks (or popsicle sticks) would be the perfect project.
Supplies:
- craft sticks (each snowflake uses 30-50 sticks, depending on design)
- hot glue gun and glue sticks
- glitter spray paint (I used Rust-oleum Red and Silver)
- ribbon, string, or rope
- OPTIONAL: paint or markers to color craft sticks if not using spray paint

I recommend protecting your work area with a large sheet of kraft paper or some other material to keep from getting hot glue everywhere. The kraft paper also comes in handy when spray painting your snowflakes.
How To:
After protecting your workspace, lay out your snowflake design. I did a Google search to get some ideas and then got started.

Alternatively, you could start by laying out your basic design first (like I did here), then decide on the final design once you have created the center of the snowflake.

Begin gluing the center of the snowflake first by pushing 3 of the craft sticks close together. Drip some glue over them, then layer the remaining 3 center sticks on top. You now have an asterisk shape.

Move to the outer craft sticks and glue them in place. While I didn’t use a ruler or firm measurements, you want to be cautious to create similar angles with your sticks. Otherwise, they may not all line up in the end – and hot glue is NOT easy to fix once it hardens!
If you didn’t finalize your snowflake design in the beginning, go ahead and finish laying out your craft sticks for your snowflake now. Then glue the remaining sticks in place.

It won’t take long for the glue to fully cool and harden, and then you’re ready to spray paint your snowflake!
Related: How to Make Easy DIY Glitter Ornaments
I took my kraft paper and my snowflake out to the grass for this part. I didn’t want to risk any overspray inside. Follow the directions on the can and shake well before using. I also give a little spray onto my kraft paper first to make sure the glitter and “paint” (which is really just clear) are coming out correctly.
You can see a video of my process here:
Don’t spray too much, or it will not dry well and may look clumpy. I did about 3 light, even layers on my snowflakes. The sun was warm and the air was a little breezy, so it dried quickly.
Once dry, you can tie your ribbon or string to your snowflake and hang it up!
I decided to hang our snowflakes from our stairs so they could decorate this huge white shiplap wall in our living room. We ran out of craft sticks, or I would’ve also let the kids make snowflakes to hang above their bedroom doors. I think they would love that!

I haven’t tried it yet, but I think another fun variation would be to make a Christmas tree with craft sticks and spray it with green glitter paint! If you try it, or if you make a snowflake wreath, please share it with me! I’d love to see.
Have fun and happy decorating!

Easy Craft Stick Snowflake Wreath
This DIY craft stick snowflake wreath is super easy to make, and is fun for the kids to help with too! With just a few supplies and about 30 minutes, you can have beautiful and unique holiday decor.
Materials
- craft sticks
- spray paint
- (optional: project paint or markers)
Tools
- glue gun
- glue sticks
Instructions
- Lay out your craft sticks into your chosen snowflake design.
- Using a hot glue gun, glue the center sticks together, making sure to use plenty of glue.
- Glue the remaining craft sticks together.
- Once glue has cooled and hardened, pull off any glue "strings" that are still attached.
- Spray paint your snowflake, following directions to add multiple coats until snowflake is fully covered.
- Hang your snowflake wreath and enjoy!
Notes
OPTION: If using paint or markers instead of spray paint, we recommend painting the craft sticks before gluing together.
Check out our other DIY Tutorials and Craft Ideas!

MEET AMANDA
Amanda is a mom of 4 living a mostly crunchy lifestyle outside of Atlanta, GA with her husband, 2 dogs, and a cat. As a former special education teacher who also has her personal training certification — Amanda really enjoys teaching others how to do things!
When she’s not working, Amanda enjoys DIY projects, exercising, photography, hiking, and long walks through Target.


